Mongoose with NextJS and GraphQL

Mongoose is a great way to use MongoDB inside React applications. However, when it comes to Server Side Rendering in NextJS, it's implementation needs to take into account certain pecularities, such as loading the database schema only once. I found that knowing this would have saved me quite some time so here we go, Mongoose with GraphQL and NextJS, using Context API:
First, create a MongoDB instance on Atlas cloud: Go to:
https://www.mongodb.com/cloud/atlas
Start Free > Sign In > Create a New Cluster
Choose your cloud provider and configuration. Create a cluster - sandbox cluster is free.
In the cluster Sandbox view click 'Connect'. Whitelist your IP. Create user. Click 'Choose a connection method'.
Click 'Connect your application'. Copy the unique url - we will use it to connect to the database. Save it, add user password and database name (we will use 'users'), keep it privately!
Then, within the cluster create a database 'users' with a collection 'users'. Here we will keep our data.
Good, let's move back to creating the app:
Let's create our app:
npx create-next-app --example with-context-api wb-context
Now, let's install Apollo Server, Mongoose and create api endpoint for the Apollo Server:
cd wb-context
npm i apollo-server-micro mongoose
cd pages
mkdir api
code graphql.js
Inside a file import the dependencies:
import { ApolloServer, gql } from "apollo-server-micro";
import mongoose from 'mongoose';
Define the GraphQL query:
const typeDefs = gql`
  type Query {
    user: String,
    email: String
  }
`;
Define the user schema. You only want to create the user schema once! Otherwise you would get errors, so better use try/catch statement instead:
let defineUserModel = async () => {
  let connect = async () => {
    let connection = await mongoose.connect('mongodb+url', {
      useNewUrlParser: true,
      useUnifiedTopology: true,
      useFindAndModify: false,
      useCreateIndex: true
    });
    return connection;
  }
  connect()
  const userSchema = new mongoose.Schema({
    user: String,
    email: String,
  })
  let UserModel;
  try {
    UserModel = mongoose.model('user');
  } catch {
    UserModel = mongoose.model('user', userSchema);
  }
  return UserModel;
}
Define the user function to get the username:
let getUser = async () => {
  let UserModel = await defineUserModel()
  const instance = await UserModel.findOne({ user: 'jaguar' }, (err, foundItem) => {
    if (err) {
      console.log(err);
      return err;
    } else {
      return foundItem
    }
  });
  let data = instance.toJSON()
  return data['user']
}
Same for email:
let getEmail = async () => {
  let UserModel = await defineUserModel()
  const instance = await UserModel.findOne({ user: 'jaguar' }, (err, foundItem) => {
    if (err) {
      console.log(err);
      return err;
    } else {
      return foundItem
    }
  });
  let data = instance.toJSON()
  return data['email']
}
So we can define the resolvers. This time they are asynchronous:
const resolvers = {
  Query: {
    user: async () => await getUser(),
    email: async () => await getEmail()
  }
}
Let's define, run on an endpount '/graphql/api' and export the Apollo Server.
const apolloServer = new ApolloServer({
  typeDefs,
  resolvers,
  context: () => {
    return {};
  }
});


const handler = apolloServer.createHandler({ path: "/api/graphql" });

export const config = {
  api: {
    bodyParser: false
  }
};

export default handler;
To create dummy data with the same user model you can run:
let createUserData = async () => {
  let UserModel = await defineUserModel()
  await UserModel.create({ user: 'jaguar', email: 'jaguar@foo.bar' });
}
createUserData()
Your graphql.js file should be:
import { ApolloServer, gql } from "apollo-server-micro";
import mongoose from 'mongoose';

const typeDefs = gql`
  type Query {
    user: String,
    email: String
  }
`;

let createUserData = async () => {
  let UserModel = await defineUserModel()
  await UserModel.create({ user: 'jaguar', email: 'jaguar@foo.bar' });
}

let defineUserModel = async () => {
  let connect = async () => {
    let connection = await mongoose.connect('mongodb+url', {
      useNewUrlParser: true,
      useUnifiedTopology: true,
      useFindAndModify: false,
      useCreateIndex: true
    });
    return connection;
  }
  connect()
  const userSchema = new mongoose.Schema({
    user: String,
    email: String,
  })
  let UserModel;
  try {
    UserModel = mongoose.model('user');
  } catch {
    UserModel = mongoose.model('user', userSchema);
  }
  return UserModel;
}


let getUser = async () => {
  let UserModel = await defineUserModel()
  const instance = await UserModel.findOne({ user: 'jaguar' }, (err, foundItem) => {
    if (err) {
      console.log(err);
      return err;
    } else {
      return foundItem
    }
  });
  let data = instance.toJSON()
  return data['user']
}

let getEmail = async () => {
  let UserModel = await defineUserModel()
  const instance = await UserModel.findOne({ user: 'jaguar' }, (err, foundItem) => {
    if (err) {
      console.log(err);
      return err;
    } else {
      return foundItem
    }
  });
  let data = instance.toJSON()
  return data['email']
}

const resolvers = {
  Query: {
    user: async () => await getUser(),
    email: async () => await getEmail()
  }
}

const apolloServer = new ApolloServer({
  typeDefs,
  resolvers,
  context: () => {
    return {};
  }
});


const handler = apolloServer.createHandler({ path: "/api/graphql" });

export const config = {
  api: {
    bodyParser: false
  }
};

export default handler;
Your _app.js file should include Apollo Client:
import '../styles/globals.css'
import ApolloClient from 'apollo-boost';
import { ApolloProvider } from '@apollo/react-hooks';

const client = new ApolloClient({
  uri: 'http://localhost:3000/api/graphql'
});
function MyApp({ Component, pageProps }) {

  return <ApolloProvider client={client}>
      <Component {...pageProps} />
    </ApolloProvider>
}

export default MyApp
Now, let's use GrapQL inside the rendered html in index.js:
import Head from 'next/head'
import styles from '../styles/Home.module.css'
import gql from 'graphql-tag';
import { useQuery } from '@apollo/react-hooks';

export default function Home() {
  const USER_QUERY = gql`
    {
      user
      email
    }
  `;
  const { loading, error, data } = useQuery(USER_QUERY);
  if (loading) {
    return <p>Loading...</p>;
  }
  if (error) {
    console.log(error)
    return <p>Error :(</p>;
  }
  return (
    <div className={styles.container}>
      <Head>
        <title>Create Next App with GraphQL</title>
        <link rel="icon" href="/favicon.ico" />
      </Head>
      <main className={styles.main}>
            <div className="App">
          <header className="App-header">
            <p>
              User is: {data.user}
            </p>
            <p>
              Email is: {data.email}
            </p>
          </header>
        </div>

      </main>
      <footer className={styles.footer}>
      </footer>
    </div>
  )
}
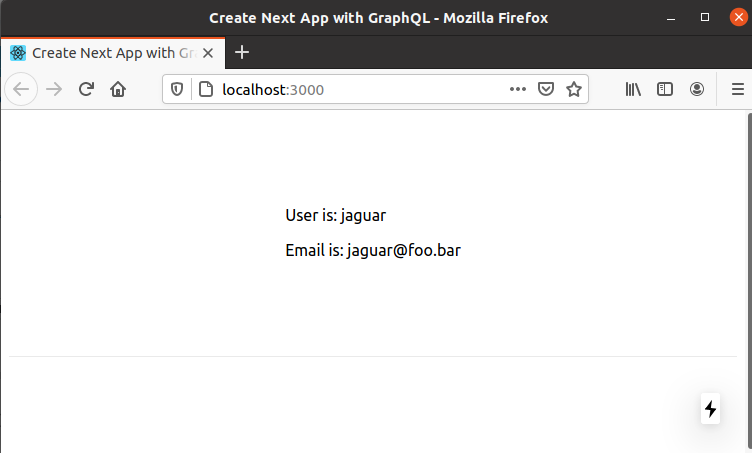
All done! You should see user data loaded on the screen. Have fun!
About the author
Talking and consulting on MLOps and machine learning. https://www.linkedin.com/company/monika-mlops-consulting/
Comments
Join the discussionNo comments yet. Be the first to comment.


